User's Guide
Installation
It is advisable to install AquaBank Saver in the most frequently used bathroom(s) in the house, and if it is the furthest one, its effect will cover all intermediate hot water faucets.
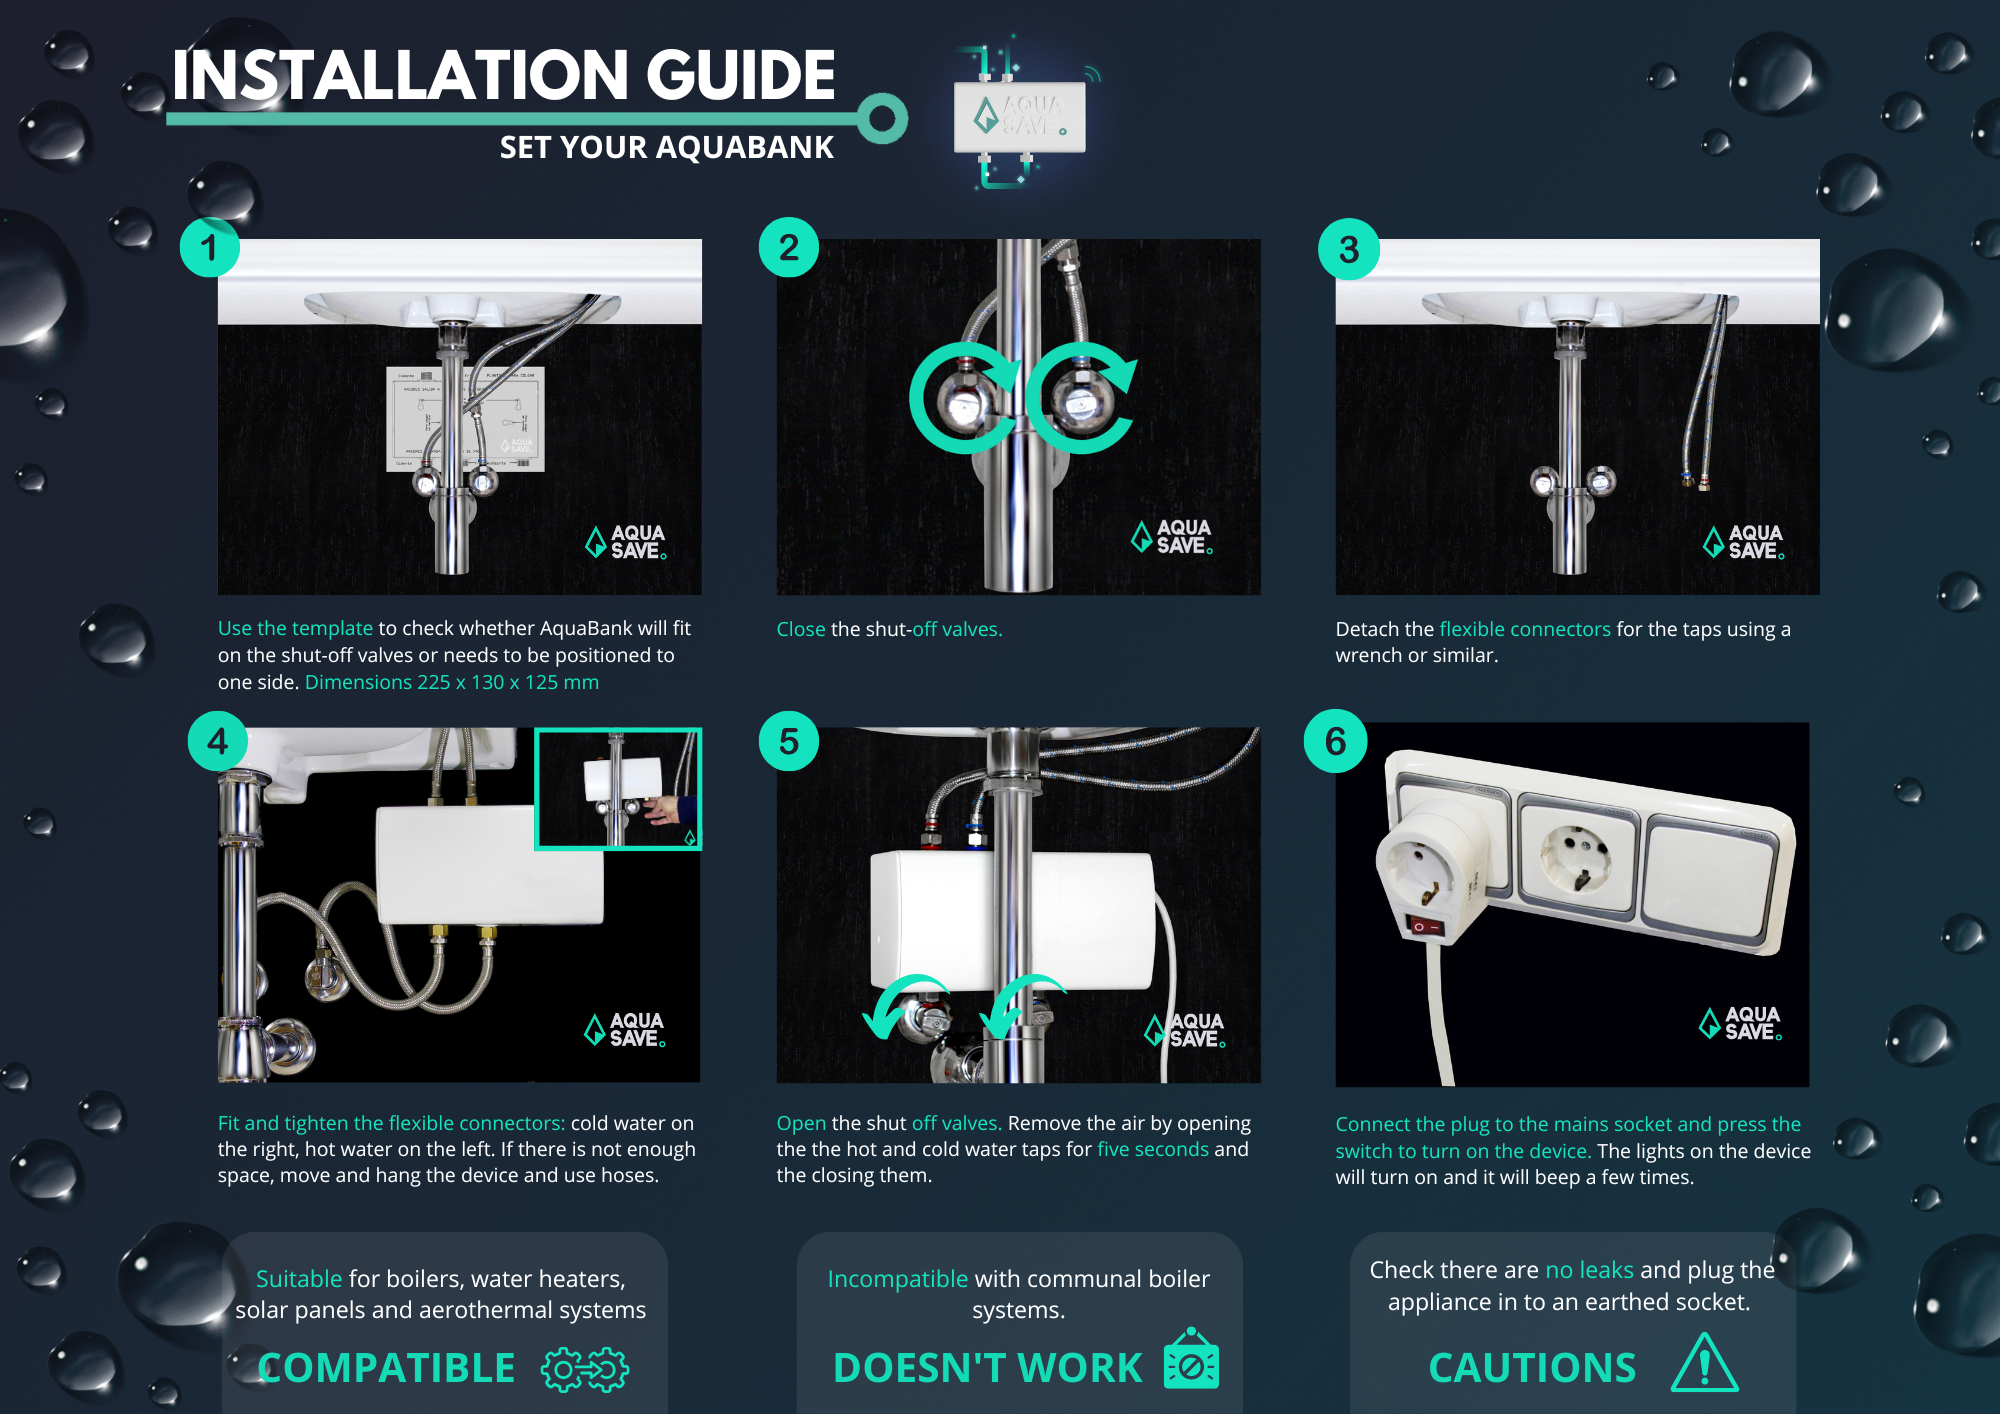
- Use the template to check whether AquaBank Saver will fit over the shut-off valves or needs to be positioned nearby.
- Close the shut-off valves.
- Detach the flexible connectors for the taps using a wrench or similar
- Fit and tighten the flexible connectors: cold water on the right, hot water on the left. If there is not enoguh space, move and hang the device and use hoses. Check there are no leaks.
- Open the shut-off valves. Remove the air by opening the hot and cold water taps for five seconds and then, close the tap(s).
- Connect the plug to the mains socket and press the switch to turn on the device. The lights on the device will turn on and it will beep a few times.
* AquaBank Saver is a device specifically designed. to be installed by anyone without any plumbing knowledge. Even so, each DHW installation is different and, in order to avoid problems, if you do not have plumbing knowledge, in some cases it is reasonable to have the installation done by a reliable plumber.
Placement Instructions
It is advisable to install AquaBank Saver in the most frequently used bathroom(s) in the house, and if it is the furthest one, its effect will cover all intermediate hot water faucets.
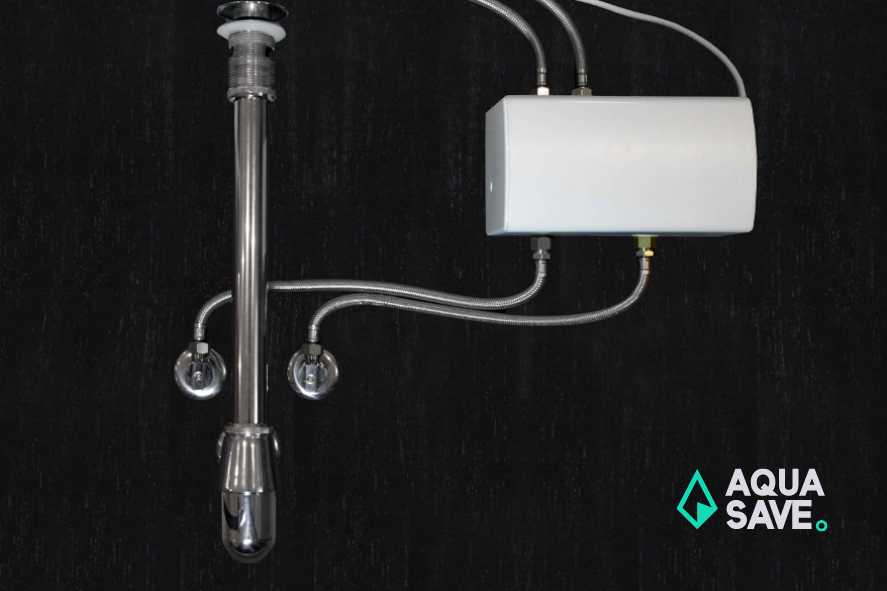
In its location, there must be at least 19 cm free from the shut-off valves to the bottom of the sink.
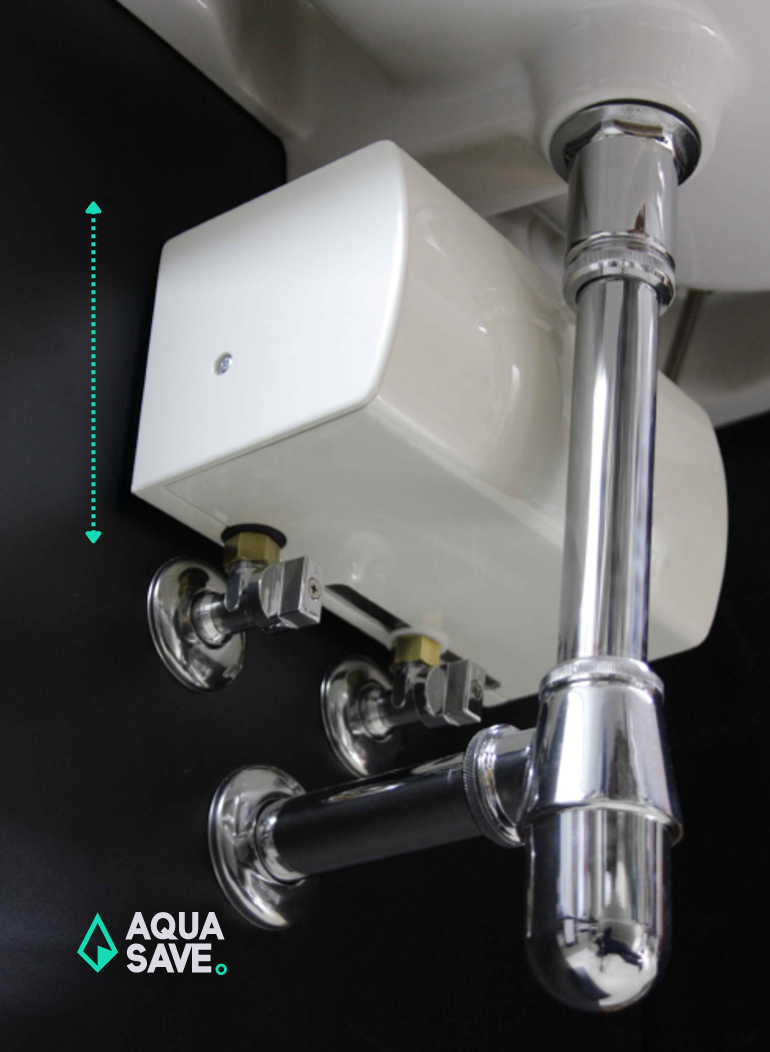
Also, at least 14 cm is needed from the wall to the drain pipe of the sink.
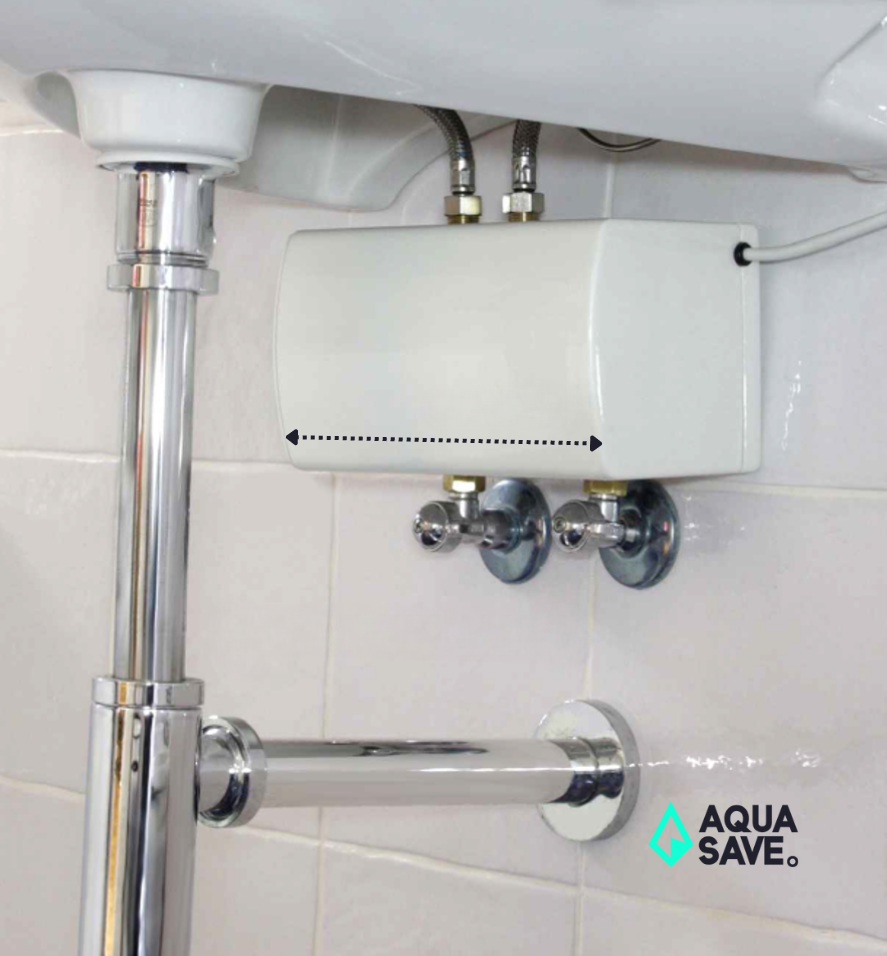
- Case A: If there is sufficient space above the stopcocks:
- AquaBank Saver does not need to be wall-mounted if it is secured over the two shut-off valves of the sink.
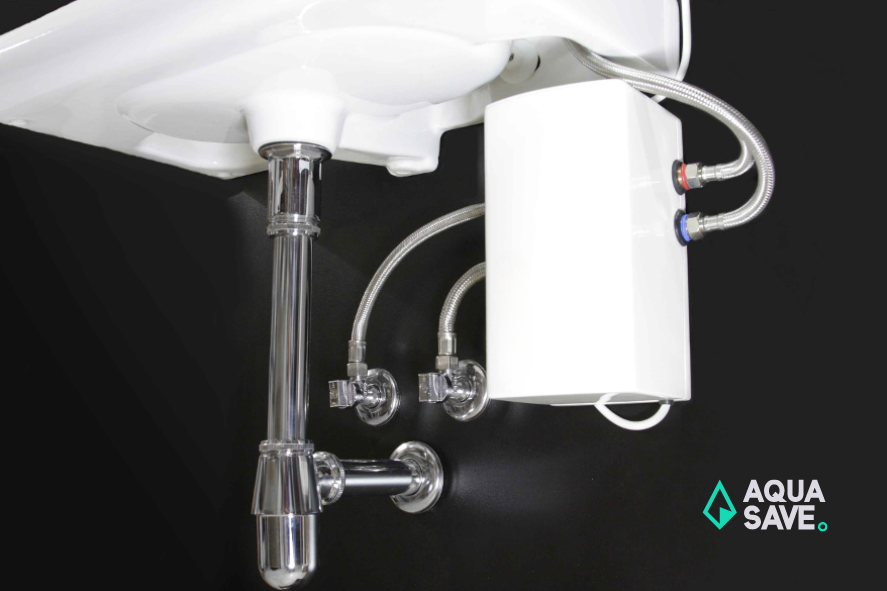
- Close the stopcocks under the sink and disconnect the hoses.
- Make sure that the stopcocks are correctly aligned.
- Install the AquaBank fittings over the stopcocks, adjusting the distance as necessary.
- Connect the faucet hoses to the AquaBank top fittings, making sure not to cross the hot and cold water lines. Fully open the stopcocks, shut-off valves, and faucets to purge the system of air.
- For different distances, two AquaBank Saver hoses should be used to carry water from the wall valves to the lower water couplings of the device. If other hoses from the market are used, we cannot guarantee the proper functioning of the device. Tighten the couplings with a 19mm wrench to prevent water leakage without damaging them.
- Case B: If space is limited or you wish to install the device inside the sink cabinet:
- Repeat the steps in case A to close the stopcocks and disconnect the hoses.
- Use AquaBank specific extension hoses to reach the desired location of the fixture.
- Use the template provided to mark and then install AquaBank on the wall or inside the lavatory cabinet.
Commissioning
Connect AquaBank Saver to the nearest power source. The device is fully automatic and will activate when the hot water faucet is turned on for the first time. After this, you can configure through the App and connect to the AquaSave network.
Ways to Operate AquaBank
- A: Activation by opening and closing the hot water tap. The device will advertise to indicate that the hot water has reached the desired temperature and is ready for use.
- B: Holding the hot water tap open until the device automatically allows hot water to flow out.
- C: You can activate the AquaBank via our AquaSaveApp, by voice commands (using Alexa) or by programming a schedule.